
Blender Extension
Install the zip directly through Blender’s extension flow. You can drag the zip into Blender or use Install from Disk…. Do not unpack the archive first.
Blaze Puppeteer installs as a Blender extension and ships with the runtime wheels needed for local generation. During extension installation, Blaze Puppeteer installs that bundled runtime automatically on the same machine where Blender is running.
Blender Extension
Install the zip directly through Blender’s extension flow. You can drag the zip into Blender or use Install from Disk…. Do not unpack the archive first.
Panel And Preferences
Open preferences, under Blaze Puppeteer choose whether the panel lives in the Sidebar (N-Panel), the Properties Tab, or both.
Local Runtime
The bundled wheels are installed automatically during extension installation. Blaze Puppeteer validates the local Kimodo assets and selects the best provider available on your machine.
| Platform | Local generation support | Notes |
|---|---|---|
| Windows x64 | Yes | Uses NVIDIA CUDA when available, otherwise CPU fallback |
| Linux x64 | Yes | Can use CUDA, ROCm, or CPU depending on the machine |
| macOS Apple Silicon | Yes | Uses Apple MPS when available, with CPU fallback |
| macOS Intel | No | Local generation is not supported on Intel macOS |
Blender version: 4.2 or newer.
Download the current Blaze_Puppeteer.zip build from your order page on Superhive Market.
Open Edit → Preferences in Blender.
Either drag the zip file into Blender, or open Get Extensions, open the top-right menu, choose Install from Disk…, and select the zip file.
Confirm the extension is enabled, then select an armature in your scene and open the Blaze Puppeteer panel. You may need to disable and re-enable the extension to see the panel.
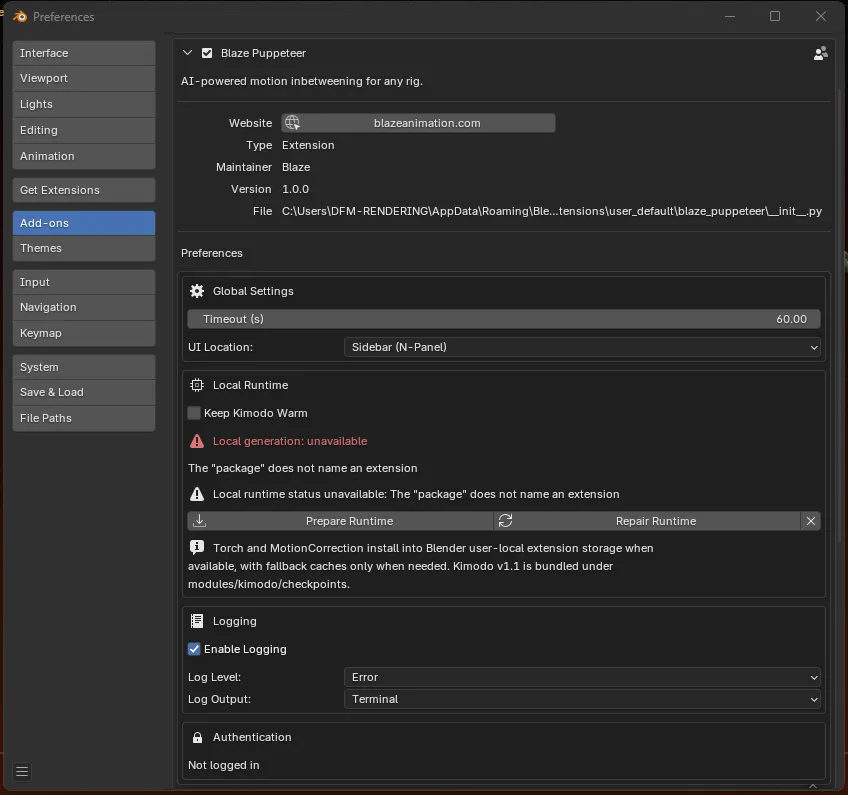
Open Preferences → Add-ons → Blaze Puppeteer and review these first:
| Setting | What it controls | Good default |
|---|---|---|
| UI Location | Shows the panel in the 3D Viewport sidebar, the Properties tab, or both | Sidebar |
| Keep Kimodo Warm | Keeps the local Kimodo worker alive between runs so subsequent generations start faster | Off unless you want faster results and don’t mind your gpu vram being used to keep the model loaded |
| Timeout (s) | Controls how long Blaze Puppeteer waits on login, credit, and Motion Refinement requests | Leave the default unless support asks you to change it |
If support asks you to inspect logs, the same preferences page also exposes logging controls. Most users can ignore them.
During extension installation, Blaze Puppeteer installs the bundled local runtime automatically and validates the included model files.
After preparation, the Local generation line should settle into one of these labels:
| Status | Meaning |
|---|---|
| Local generation: GPU (Torch CUDA) | Kimodo is using a CUDA-capable NVIDIA setup |
| Local generation: GPU (Torch ROCm) | Kimodo is using a ROCm-capable Linux setup |
| Local generation: GPU (Torch MPS) | Kimodo is using Apple Silicon acceleration |
| Local generation: CPU (Torch) | Kimodo is ready, but running on CPU |
If you still see Local generation: checking… for too long or an error state, go to Troubleshooting.
The Motion panel also needs Rig Setup: Ready before you can generate against a character. Runtime readiness and rig readiness are separate checks.

For normal updates, you do not need to uninstall the existing extension first. Download the new zip, then drag it into Blender or use Install from Disk… and select the new build.
Blender stores extension user data separately from the installed extension package files, so the update process should not delete your saved custom prompt embeddings. Making a backup before installing a new version is still a good precaution.
Custom prompts are saved automatically after they are generated successfully. You do not need to save them manually. After the first successful use, the prompt embedding is stored locally, so reusing the same custom prompt later should not use another credit.
The file is named:
custom_prompt_embeddings.jsonIt is usually stored in the extension folder for the Blender version you are using. Replace YourUserName and YourBlenderVersion with your own user name and Blender version, such as 4.2, 4.3, 4.4, 4.5, 5.0, or 5.1.
Windows
C:\Users\YourUserName\AppData\Roaming\Blender Foundation\Blender\YourBlenderVersion\extensions\.user\user_default\blaze_puppeteer\custom_prompt_embeddings.jsonmacOS Apple Silicon
/Users/YourUserName/Library/Application Support/Blender/YourBlenderVersion/extensions/.user/user_default/blaze_puppeteer/custom_prompt_embeddings.jsonLinux
/home/YourUserName/.config/blender/YourBlenderVersion/extensions/.user/user_default/blaze_puppeteer/custom_prompt_embeddings.jsonIf your Linux environment uses XDG_CONFIG_HOME, the file may be under:
$XDG_CONFIG_HOME/blender/YourBlenderVersion/extensions/.user/user_default/blaze_puppeteer/custom_prompt_embeddings.jsonTo back it up, copy custom_prompt_embeddings.json somewhere safe before installing the new zip.
When you install a new build:
Blaze_Puppeteer.zip from your order page.