
Set Base is a checkpoint
Press Enter whenever the pose reaches a state you would be unhappy to lose. It stores that pose for Restore and clears the constraints. The next drag still begins from whatever pose is visible at that moment.
Save checkpoints, copy and paste poses on the same character, insert keyframes, or record a continuous AutoPose take.
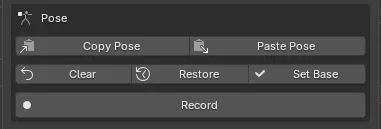
Despite its name, Set Base does not create a fixed pose that later solves work from. It saves the pose you can see as a checkpoint for Restore. Whenever you begin a drag, AutoPose works from the pose that was visible immediately before that drag.
| Button | Shortcut | What it does |
|---|---|---|
| Set Base | Enter | Saves the current pose as the Restore checkpoint and deactivates every constraint |
| Restore | Returns the character to the saved checkpoint and deactivates every constraint | |
| Clear | Deactivates every constraint and keeps the visible pose without replacing the checkpoint |
Set Base is a checkpoint
Press Enter whenever the pose reaches a state you would be unhappy to lose. It stores that pose for Restore and clears the constraints. The next drag still begins from whatever pose is visible at that moment.
Restore returns to the checkpoint
Went too far? Restore puts the character back at the last checkpoint and deactivates the constraints.
Clear deactivates every constraint
The current pose stays where it is, but none of the existing constraints continue to affect later drags.
Ctrl + C copies the complete AutoPose pose. Ctrl + V pastes it and saves it as the Restore checkpoint. The panel buttons Copy Pose and Paste Pose do the same thing.
The clipboard belongs to the same reconstructed character. Paste does not transfer a pose to a different rig.
Press I to insert normal Blender keyframes on the FK controls AutoPose moved, plus the character’s world location.
If Blender’s Auto Key is on, those keyframes are added automatically as you pose.
You can insert keys while AutoPose is active without switching to Object Mode or Manual Pose. Version 1.1.0 improves stability when retiming, duplicating, or deleting keyframes during a session; deleted keys no longer return when switching modes.
Linked characters can also be keyed and recorded when you use an editable library override. AutoPose keeps those edits local to your scene.
Keying gives you one pose at a time. Record gives you a continuous take.
Recording begins at the current frame and moves forward from there.
Recording begins at the current timeline frame and captures the initial pose. The button starts counting collected frames.
Each completed pose is captured on the next frame. Keep dragging constraints to build the take.
Press the button again, or Esc. The button changes to Baking N recorded frames… while the take is written out.