
Interface & Preferences
This page covers the AutoPose panel, viewport dock, viewport controls, colours, shortcuts, and support tools.
The Panel
Section titled “The Panel”AutoPose has one panel, in the 3D Viewport sidebar under the Blaze AutoPose tab. The installed version appears beside the add-on name in the panel header. The panel always shows the same three things at the top:
- Character Rig - which armature everything below applies to.
- Rig Setup / AutoPose - which mode you are in.
- The status line - what just happened.
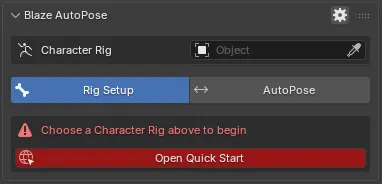
The status line is worth paying attention to. Most of AutoPose’s feedback arrives there rather than in a popup, and it turns red with an explanation when something goes wrong.
The FK toggle beside Manual Pose chooses whether the AutoPose result transfers to the rig’s FK controls or the rig’s existing manual pose is restored. It is on by default. See Manual Pose for both options and returning from IK posing.
The Viewport Dock
Section titled “The Viewport Dock”The dock is a floating bar of round buttons that sits over the 3D viewport during a session, carrying the actions you reach for most. It is off by default. Turn it on under Preferences → Viewport Controls → Viewport Dock.

The dock carries eleven actions, in this order:
| Button | Does |
|---|---|
| Set Base | Saves the current pose as the Restore checkpoint |
| Restore | Returns the character to the saved checkpoint |
| Clear | Deactivates every constraint and keeps the visible pose |
| Record | Records solved poses to keyframes |
| AutoPose / Manual Pose | Switches between AutoPose and the rig’s own Pose Mode |
| Preserve Foot Contact | Uses soft guidance for planted feet; it does not lock them in place |
| Mesh-aware Occlusion | Dims controls that sit behind the character’s mesh |
| Position / Rotation | Switches the selected constraint between the two types |
| Freeze | Prevents editing the selected handle without changing whether its constraint is active |
| Unfreeze | Allows the selected handle to be edited again without changing its active state |
| Unhide All | Shows every hidden constraint |
Handling it is straightforward: drag the bar by its grip to move it, click the grip to collapse it down, and click it again to bring it back. Push it against the left or right edge to switch to a vertical layout. Hovering a button for a moment shows what it does. If you ever shrink it and lose track of it, Reset Dock Position in preferences brings it back to the middle and expands it.
Viewport Controls
Section titled “Viewport Controls”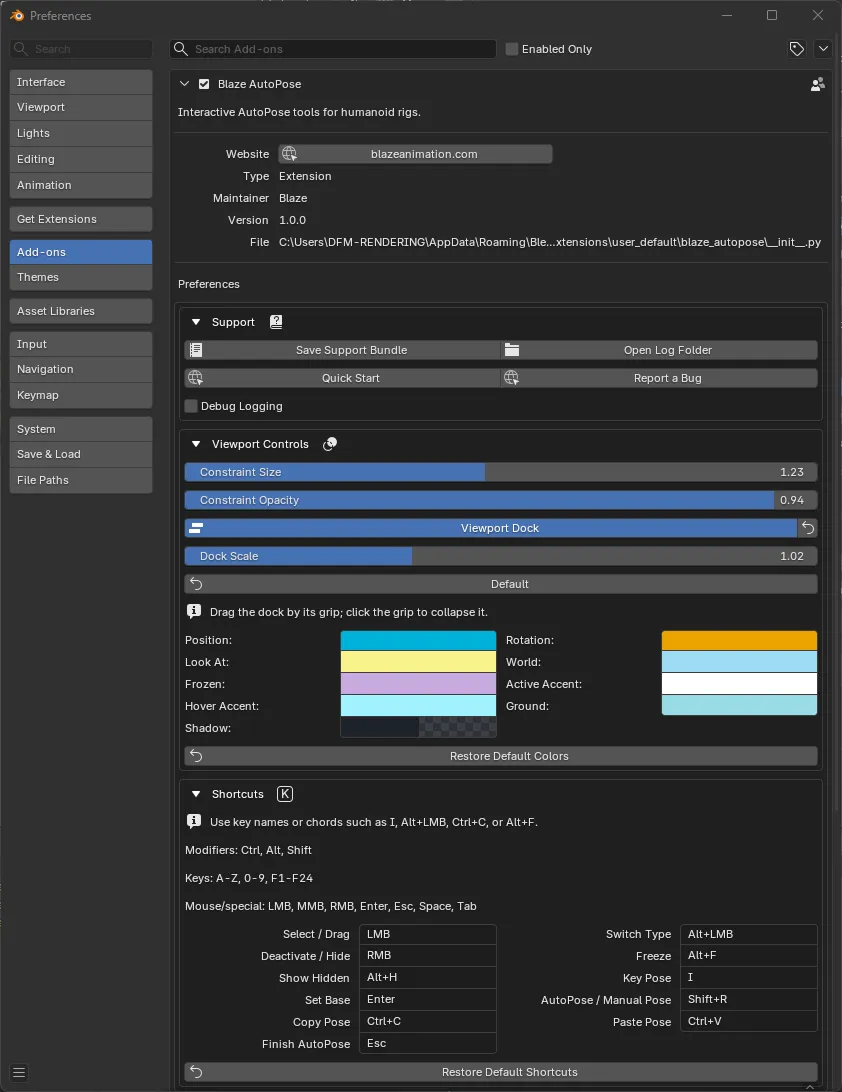
| Setting | What it changes |
|---|---|
| Constraint Size | Scales every handle and its active indicator |
| Constraint Opacity | How solid a resting handle is drawn. 1.0 is fully opaque |
| Viewport Dock | Shows the floating dock during a session |
| Dock Scale | Sizes the dock on top of Blender’s UI scale |
| Show FK Reminder | Shows a dismissible reminder to snap IK edits to FK before returning to AutoPose |
Colours
Section titled “Colours”Every colour AutoPose draws is yours to change: Position, Rotation, Look At, World, Frozen, Active Accent, Hover Accent, Ground, and Shadow.
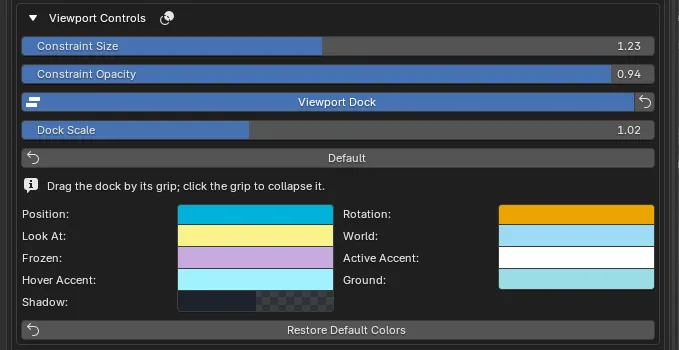
The defaults are picked to stay clearly distinct from each other at a glance. Shadow is the outline drawn behind the handles to keep them visible against a background of a similar colour; if handles are disappearing into your scene, that is the one to darken.
By default, position controls are blue, rotation controls are orange, look-at targets are yellow, the world control is light blue, and frozen controls are purple. An active constraint also gains an extra ring, so you can see which targets are guiding the current pose.
Restore Default Colors puts the whole palette back.
Shortcuts
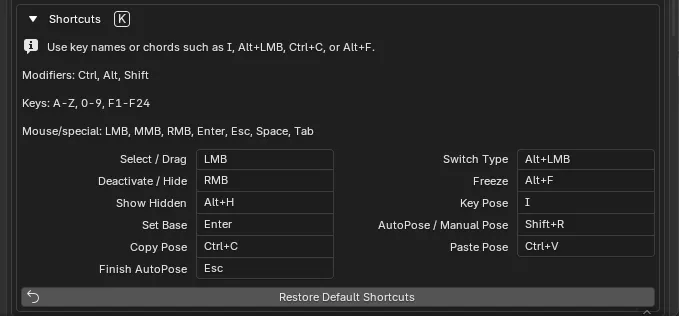
Section titled “Shortcuts”Every AutoPose binding can be changed under Preferences → Shortcuts.
| Action | Default |
|---|---|
| Select / Drag | LMB |
| Switch Type | Alt + LMB |
| Deactivate / Hide | RMB |
| Freeze | Alt + F |
| Show Hidden | Alt + H |
| Key Pose | I |
| Set Base | Enter |
| AutoPose / Manual Pose | Shift + R |
| Copy Pose | Ctrl + C |
| Paste Pose | Ctrl + V |
| Finish AutoPose | Esc |
Type the chord you want directly into the field. The accepted vocabulary is listed above the fields in preferences:
- Modifiers: Ctrl, Alt, Shift
- Keys: A-Z, 0-9, F1-F24
- Mouse and special: LMB, MMB, RMB, Enter, Esc, Space, Tab
A field turns red when its chord cannot be read or when it collides with another binding, and the message underneath says exactly which one it collides with. An invalid shortcut falls back to its default until you fix it, so you can never lock yourself out of an action. Restore Default Shortcuts resets all of them.
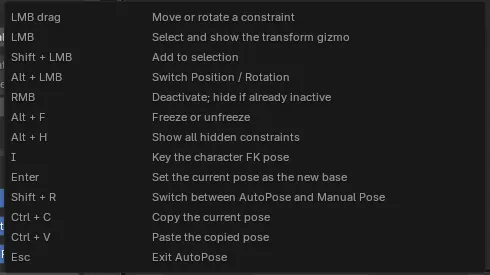
The ? button in the Constraints header opens this list at any time, and it shows your bindings rather than the defaults.
Support Tools
Section titled “Support Tools”The Support section of preferences is where you go when something is not behaving.

| Control | What it does |
|---|---|
| Save Support Bundle | Writes a single text report to attach to a bug report |
| Open Log Folder | Opens the folder holding this session’s log |
| Quick Start | Opens the getting-started documentation |
| Report a Bug | Opens the Blaze creator page on Superhive, where you can send a message |
| Debug Logging | Writes detailed diagnostics while you reproduce a problem |
Support Bundles
Section titled “Support Bundles”A support bundle is one text file containing the add-on version, your device, a summary of the rig setup, recent status messages, and the tail of the session log. It is the single most useful thing to attach to a bug report.
The file dialog offers Include Object Names. Leave it on for the most useful report. Turn it off and scene, rig, and file names are replaced with anonymous tokens and free-text sections are left out, which matters if you are working on something you cannot share the naming of.
The same button appears next to any error message in the panel, so you can capture a bundle at the moment the problem happens.
AutoPose writes a log for each Blender session, and keeps the last five. Open Log Folder takes you straight there.
Turn on Debug Logging before reproducing a problem, not after. The extra detail is what makes a report actionable, and the panel confirms it is active while it is on.
Debug logging can lower viewport FPS while it records diagnostics. This is expected; turn it off when you finish reproducing the issue.